Artifact Progression Through Environments in Spinnaker
Prerequisites
Configure Github to post push events
Add two Kubernetes accounts (staging and prod)
Overview of promoting artifacts between environments
One of the more powerful and common uses of Spinnaker is the promotion of an artifact through a series of environments, i.e. from staging to prod.
In such a workflow, a pipeline might initially be triggered by the creation or modification of an artifact. While the artifact itself may be a manifest, a Docker image, or a number of other possibilities, what is important is that once it is initially deployed, the artifact’s subsequent promotion is dependent on the result of the artifact’s deployment to the previous environment.
Determining promotion success can be accomplished through the completion of integration tests or another automated method but it can also be determined through manual judgement. We make use of the latter case in our example below.
Below is an example where we deploy an artifact to our staging environment.
The successful completion of this pipeline then triggers another pipeline
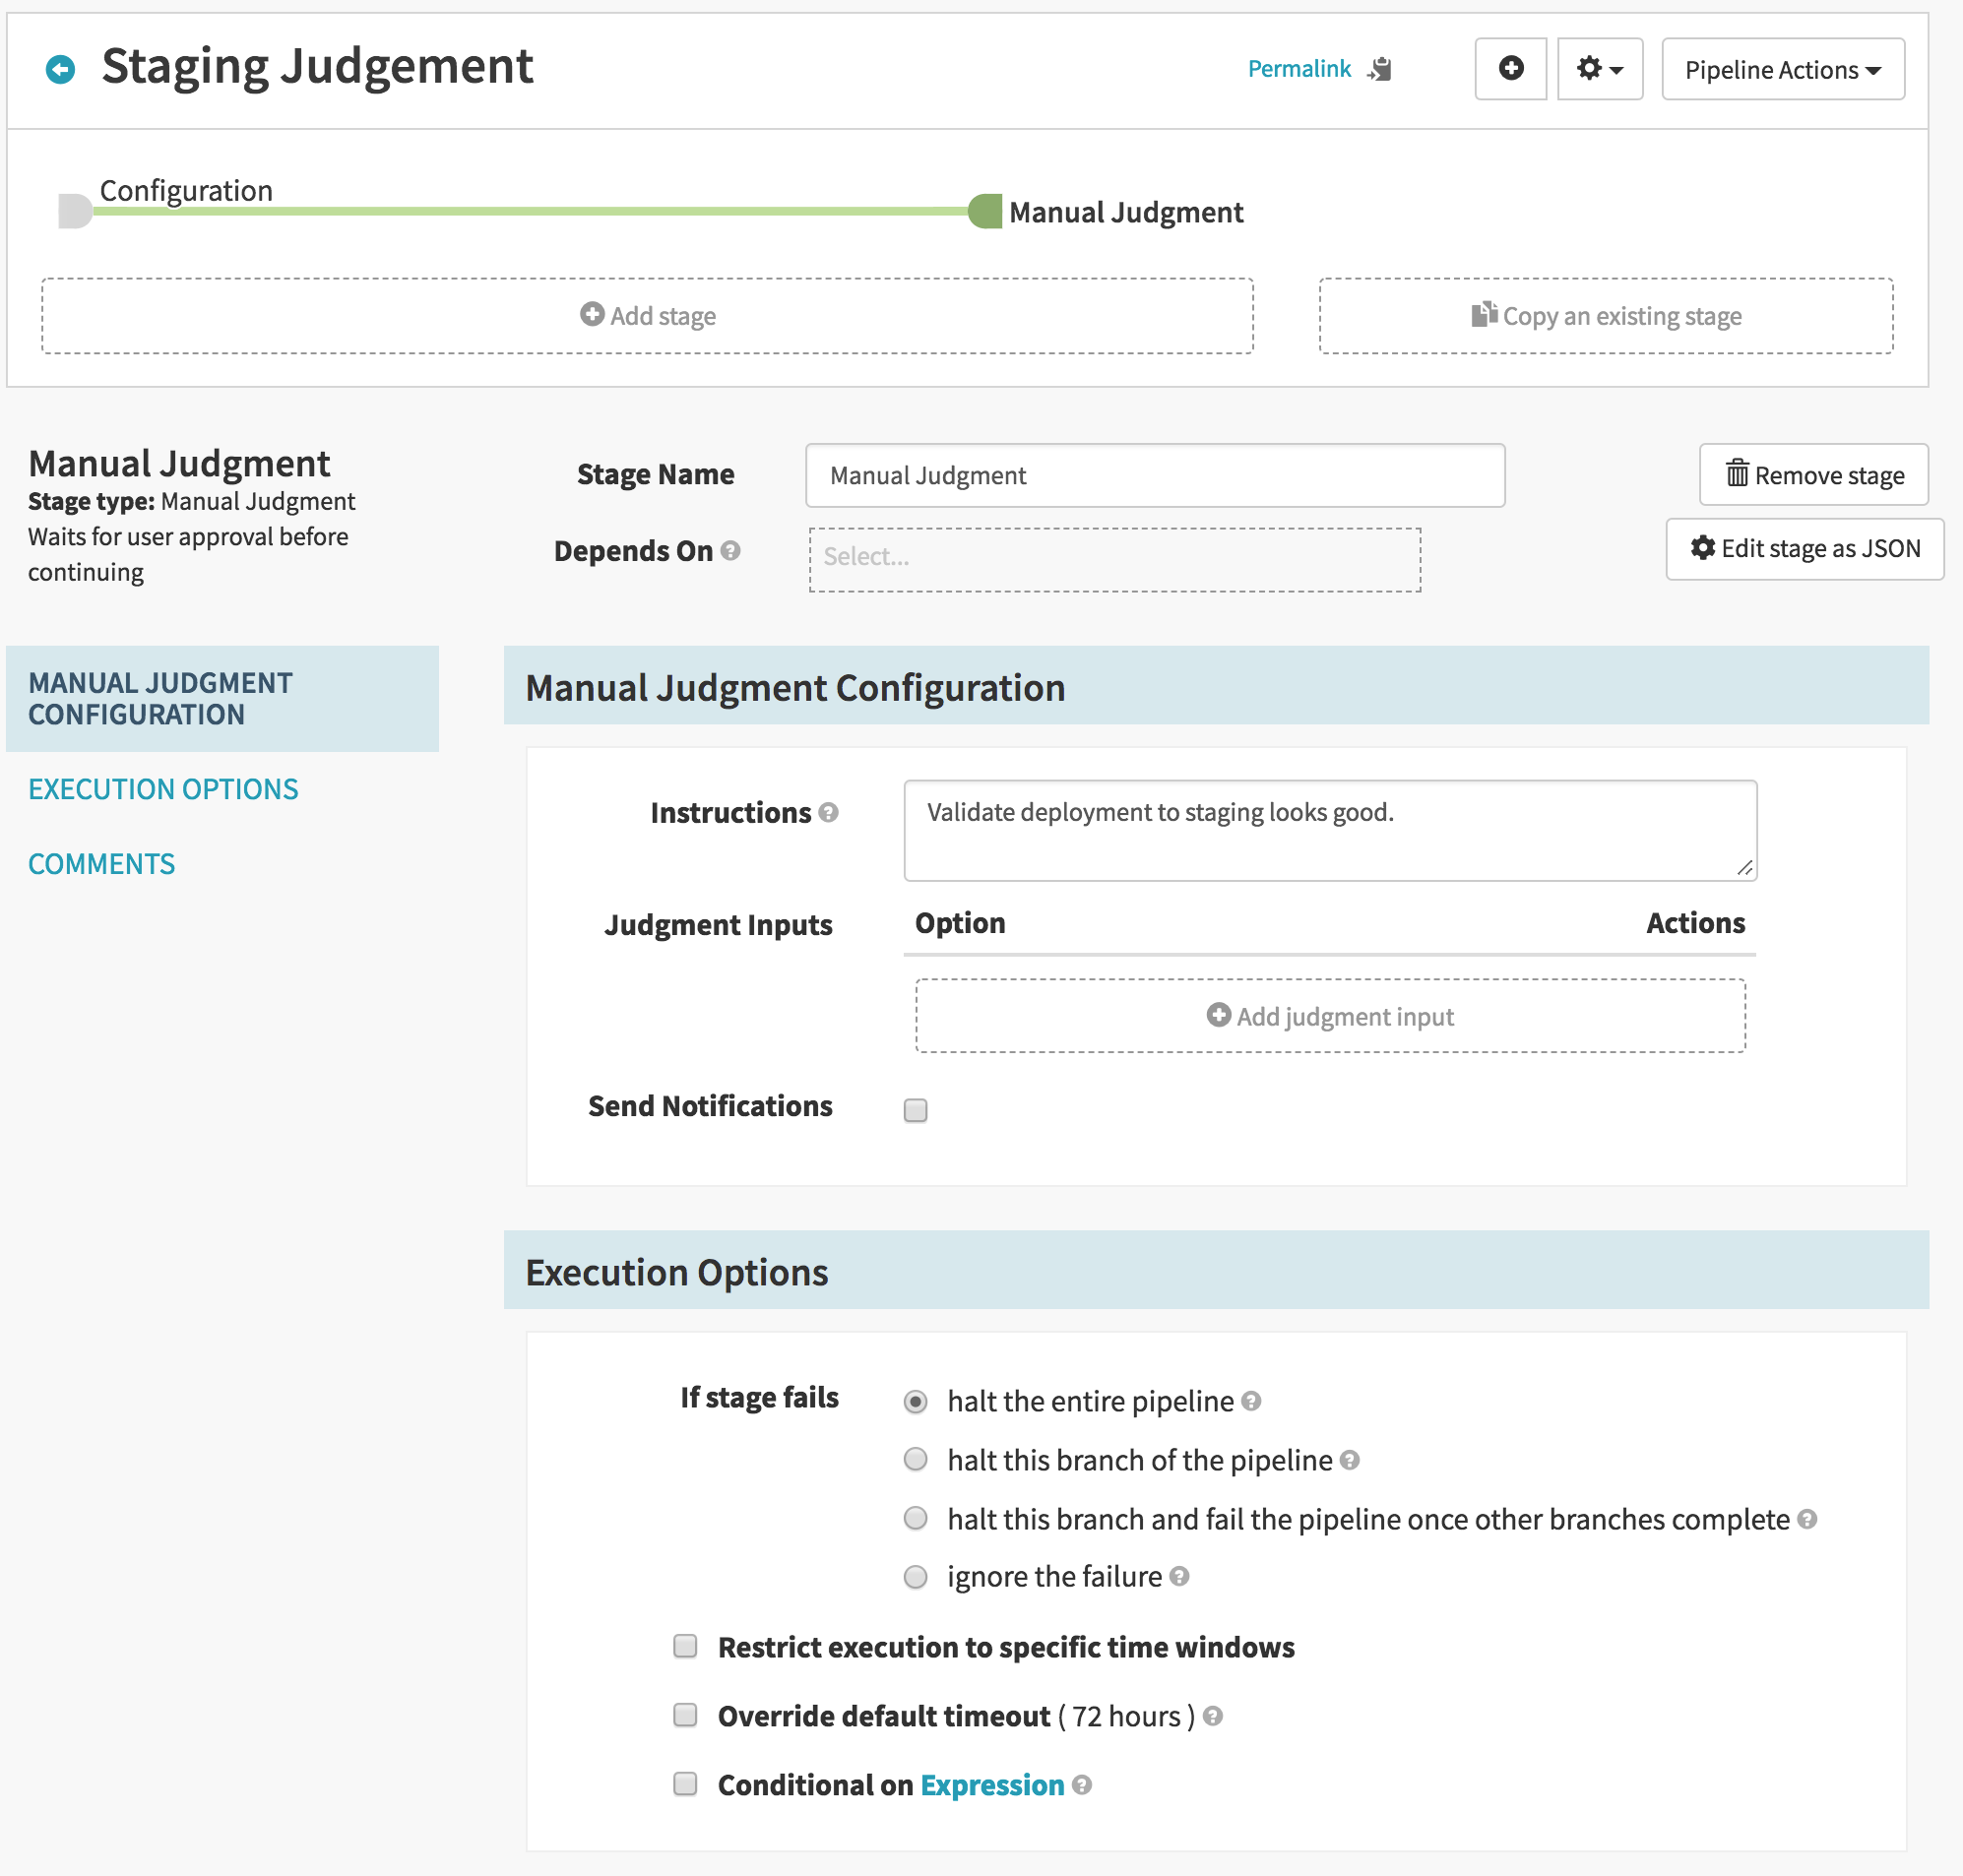
configured with a Manual Judgement stage. If manual judgement succeeds, a
third stage is triggered which takes the same artifact we initially deployed
into our staging environment and deploys it to our production environment.
Deploy to Staging
We begin by creating a new application named artifact-promotion-demo. Once
you have created your application, click on Pipelines and then Configure a new pipeline.
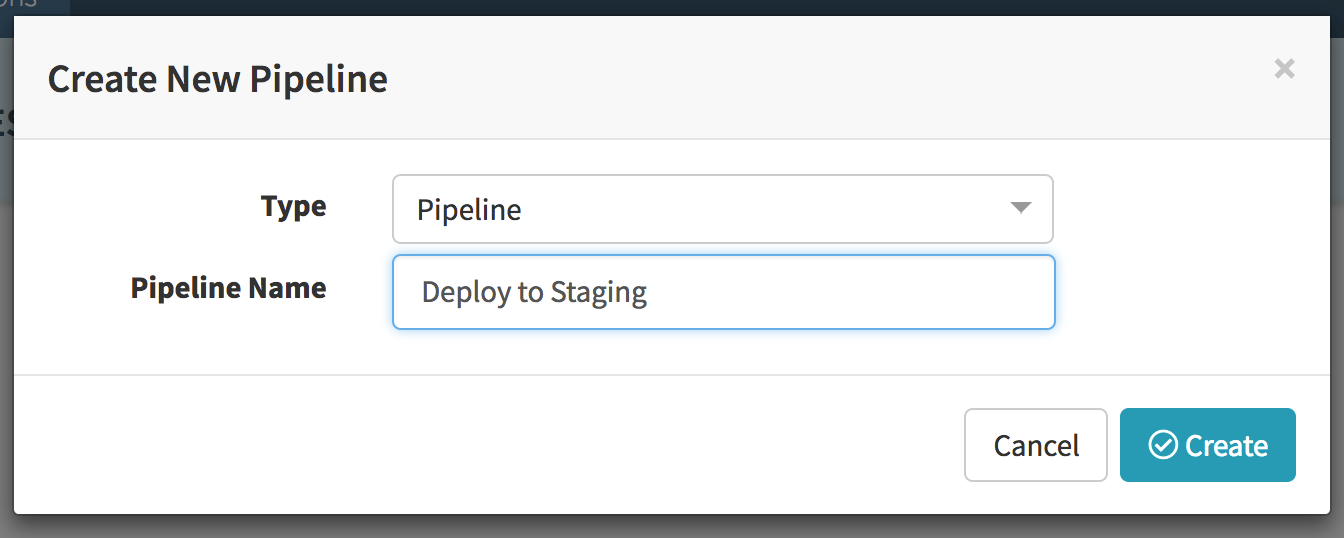
We want this initial pipeline to be responsible for our artifact’s deployment
to staging. With this in mind, we have named it Deploy to Staging
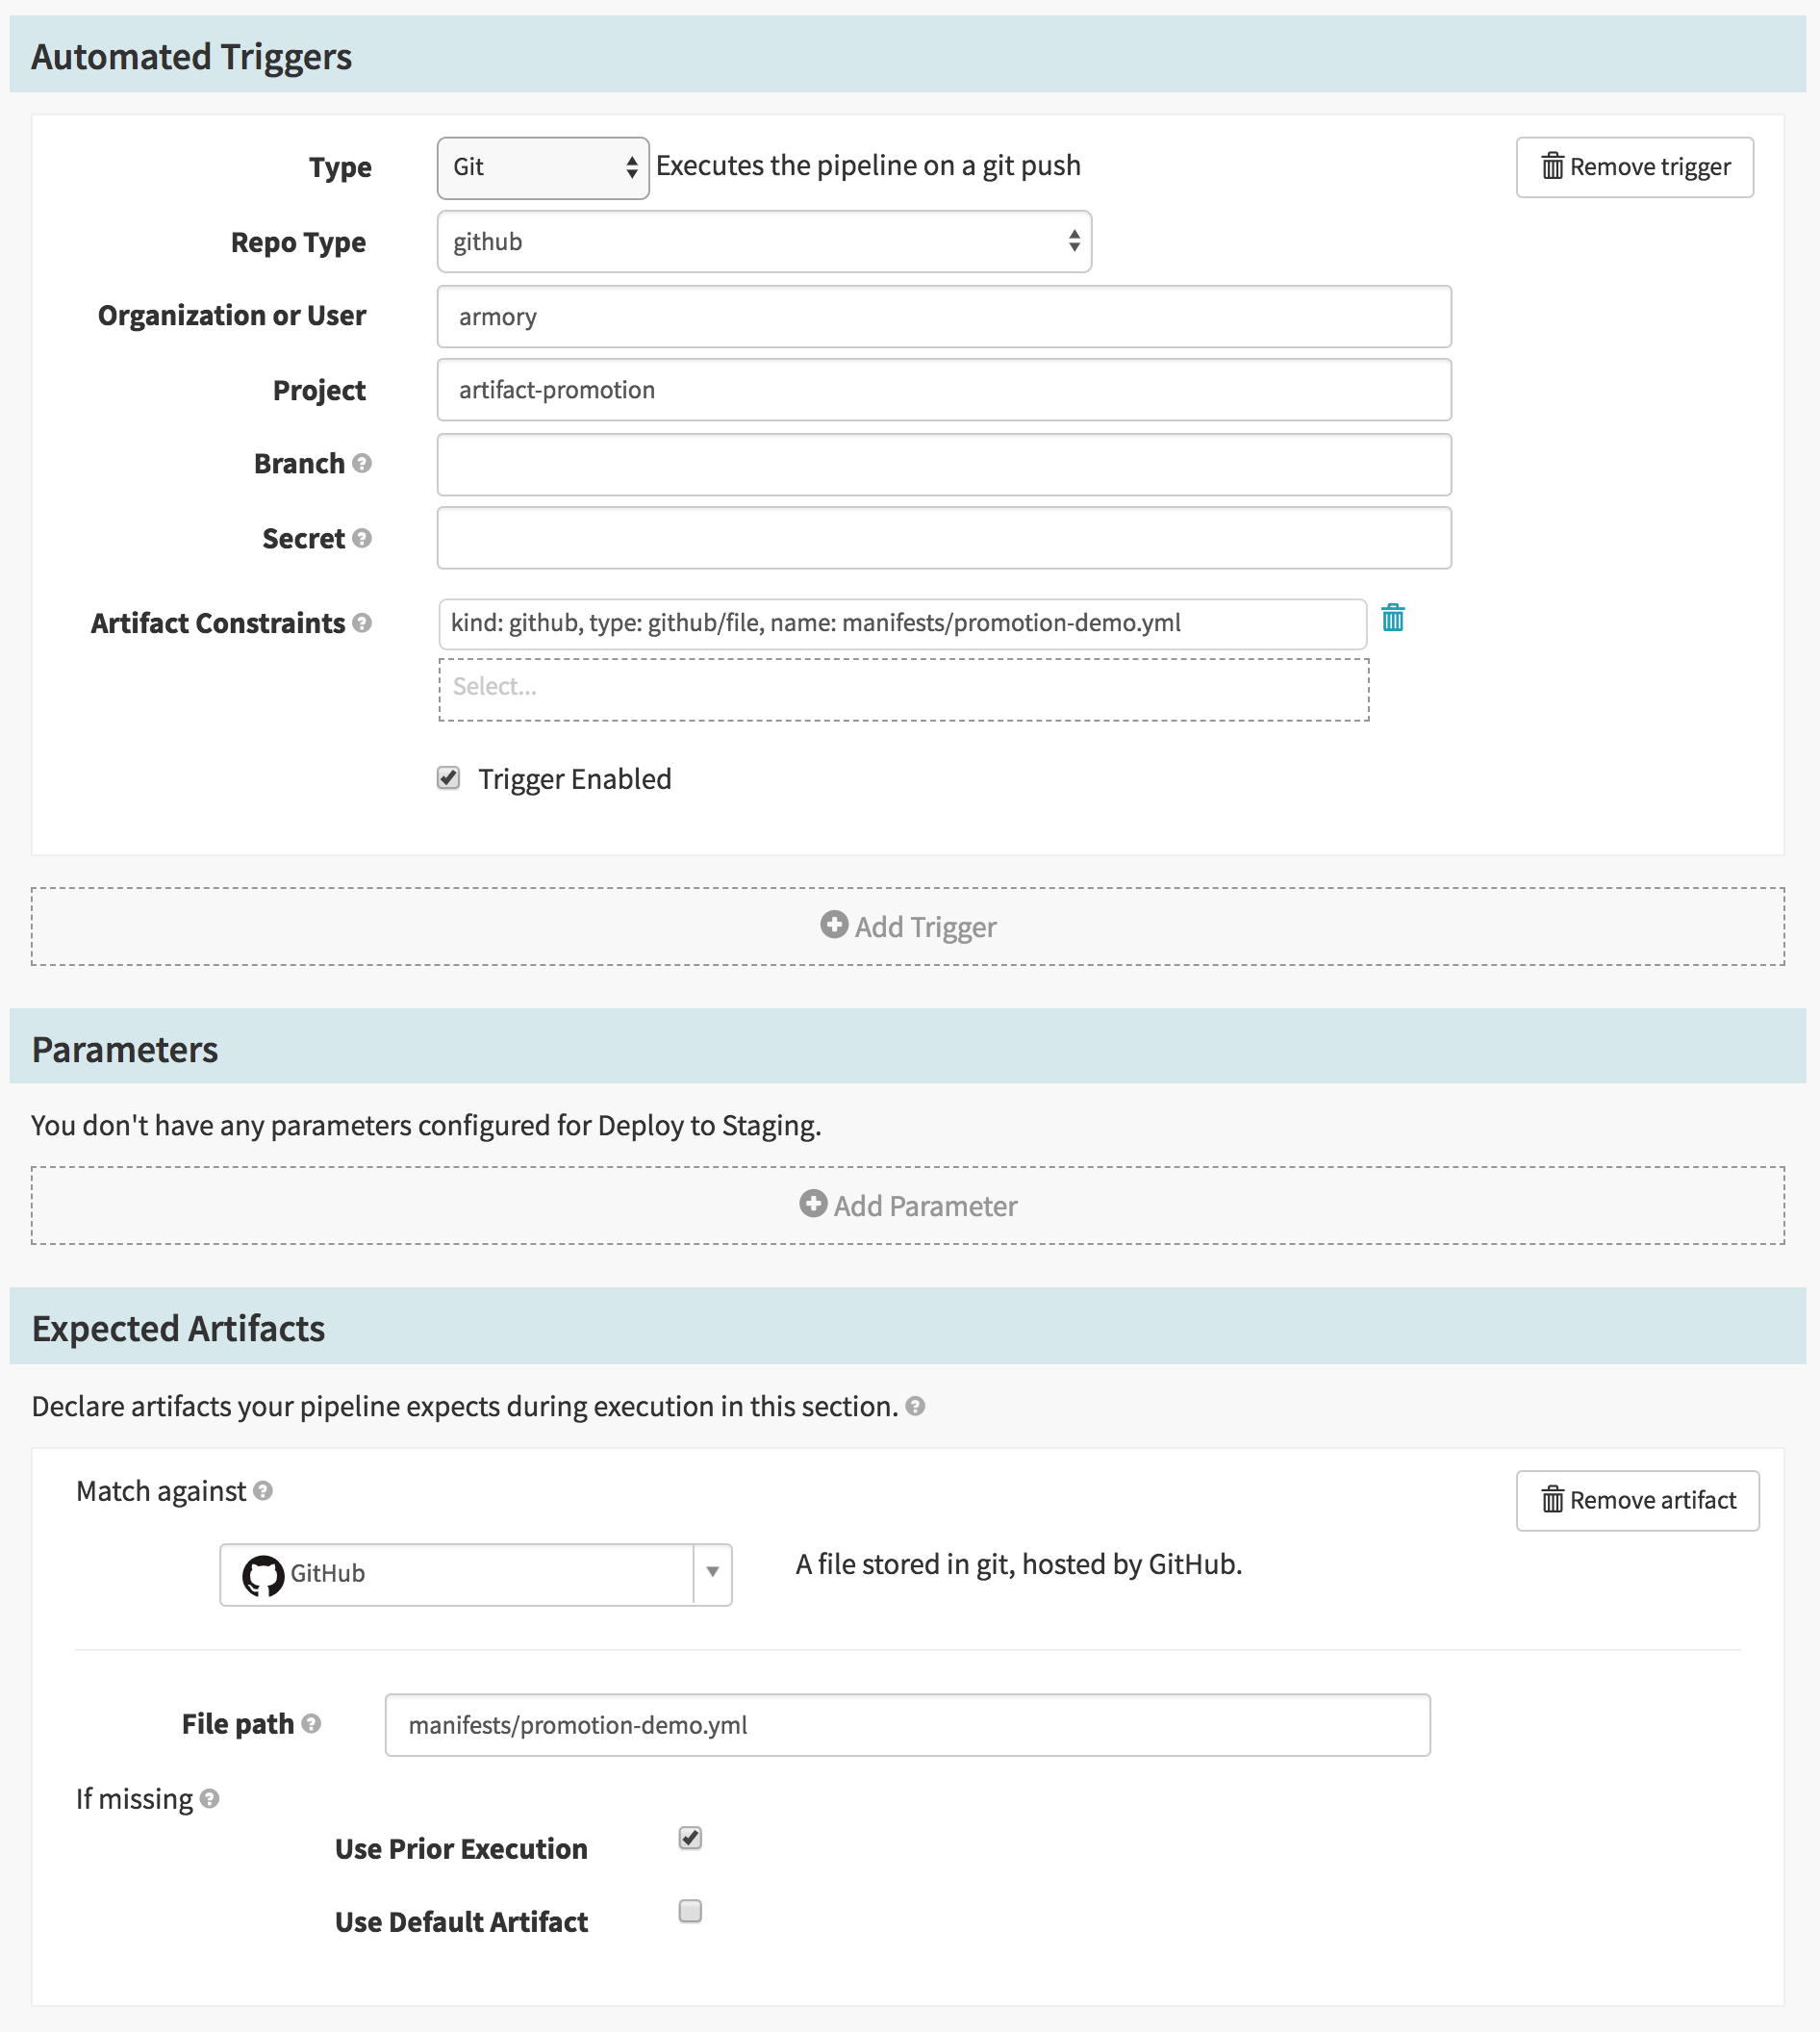
You should now configure the expected artifacts for your pipeline and specify how your pipeline should be triggered. In our example we have specified a manifest (stored in our Github repo) as our artifact and set our pipeline to trigger automatically when changes to our manifest are detected.
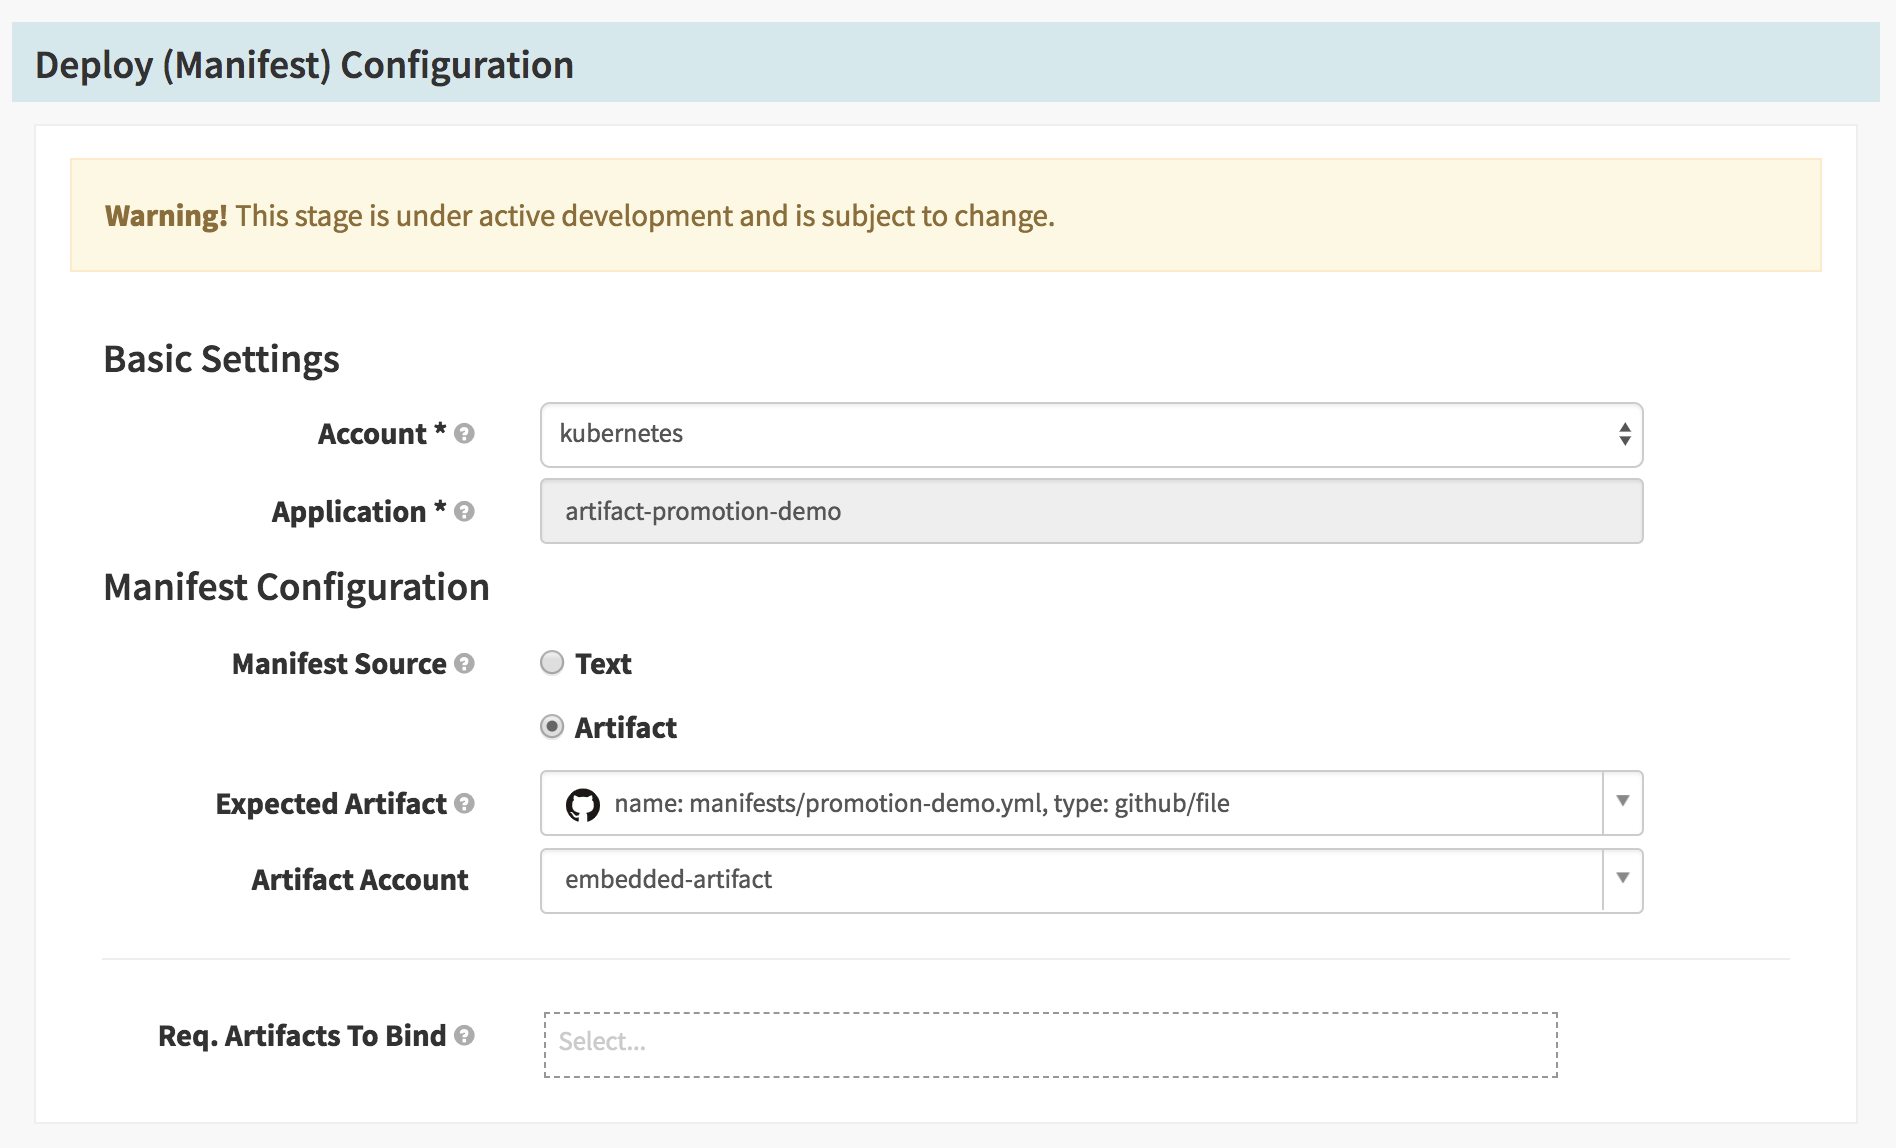
Next, click Add stage. Provide your new stage a descriptive name – we have
chosen Deploy to Staging as ours. In order to deply our artifact, we choose
Deploy (Manifest) as our Stage Type and specify Artifact as our Manifest
Source. Finally, we select our arfifact from the Expected Artifact dropdown.
Save your changes.
Validate your Deployment
Now that we have a pipeline deploying to staging, we want validate that the deployment was successful before promoting our artifact to production.
Click Pipelines and then click + Create to create a new pipeline. We have
named ours Staging Judgement.
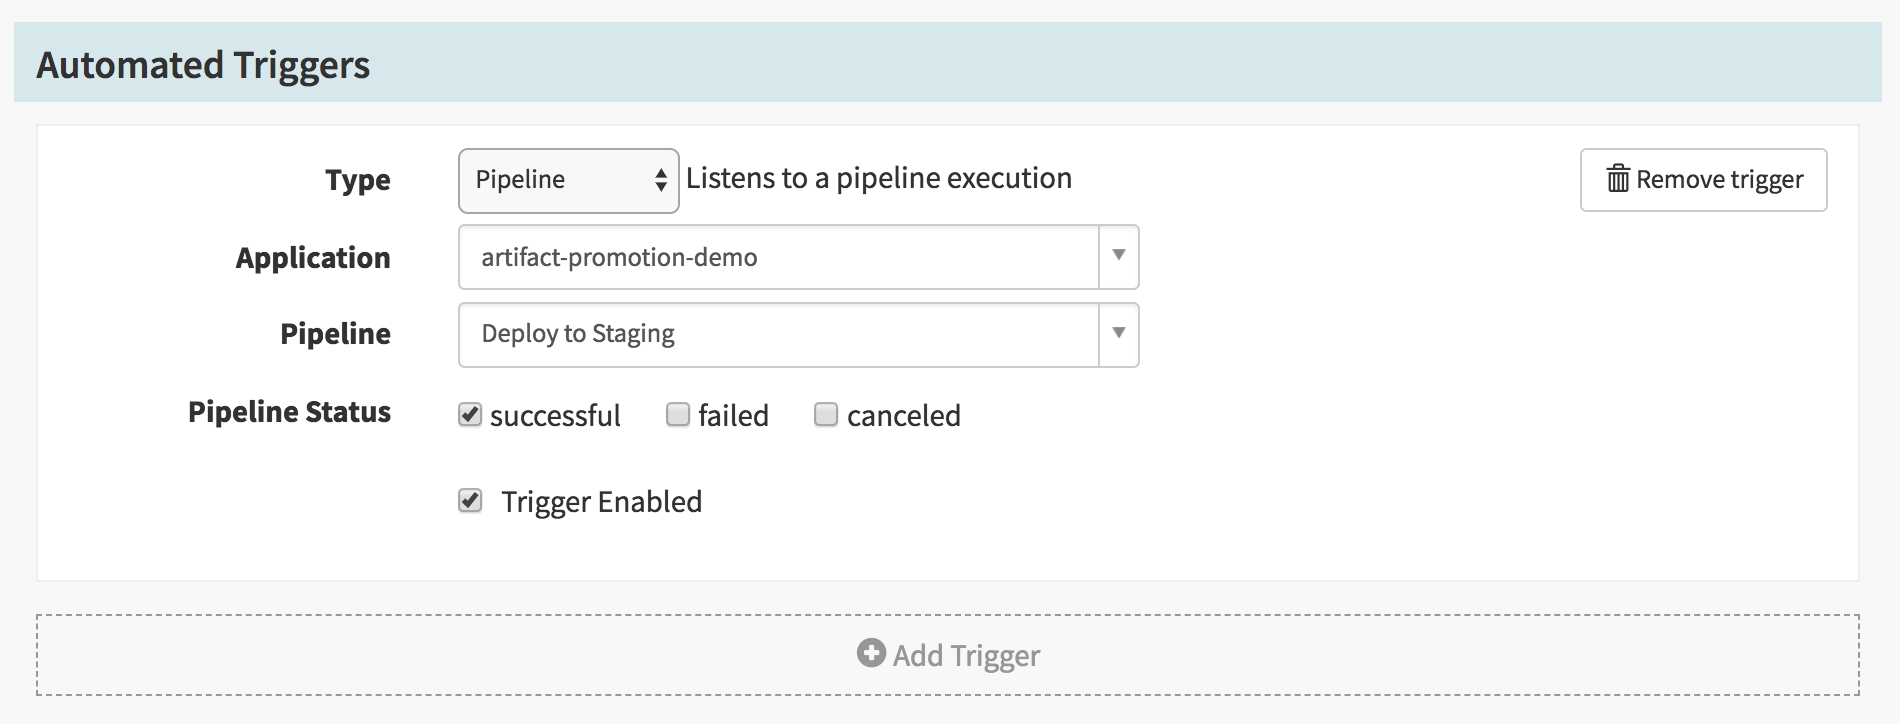
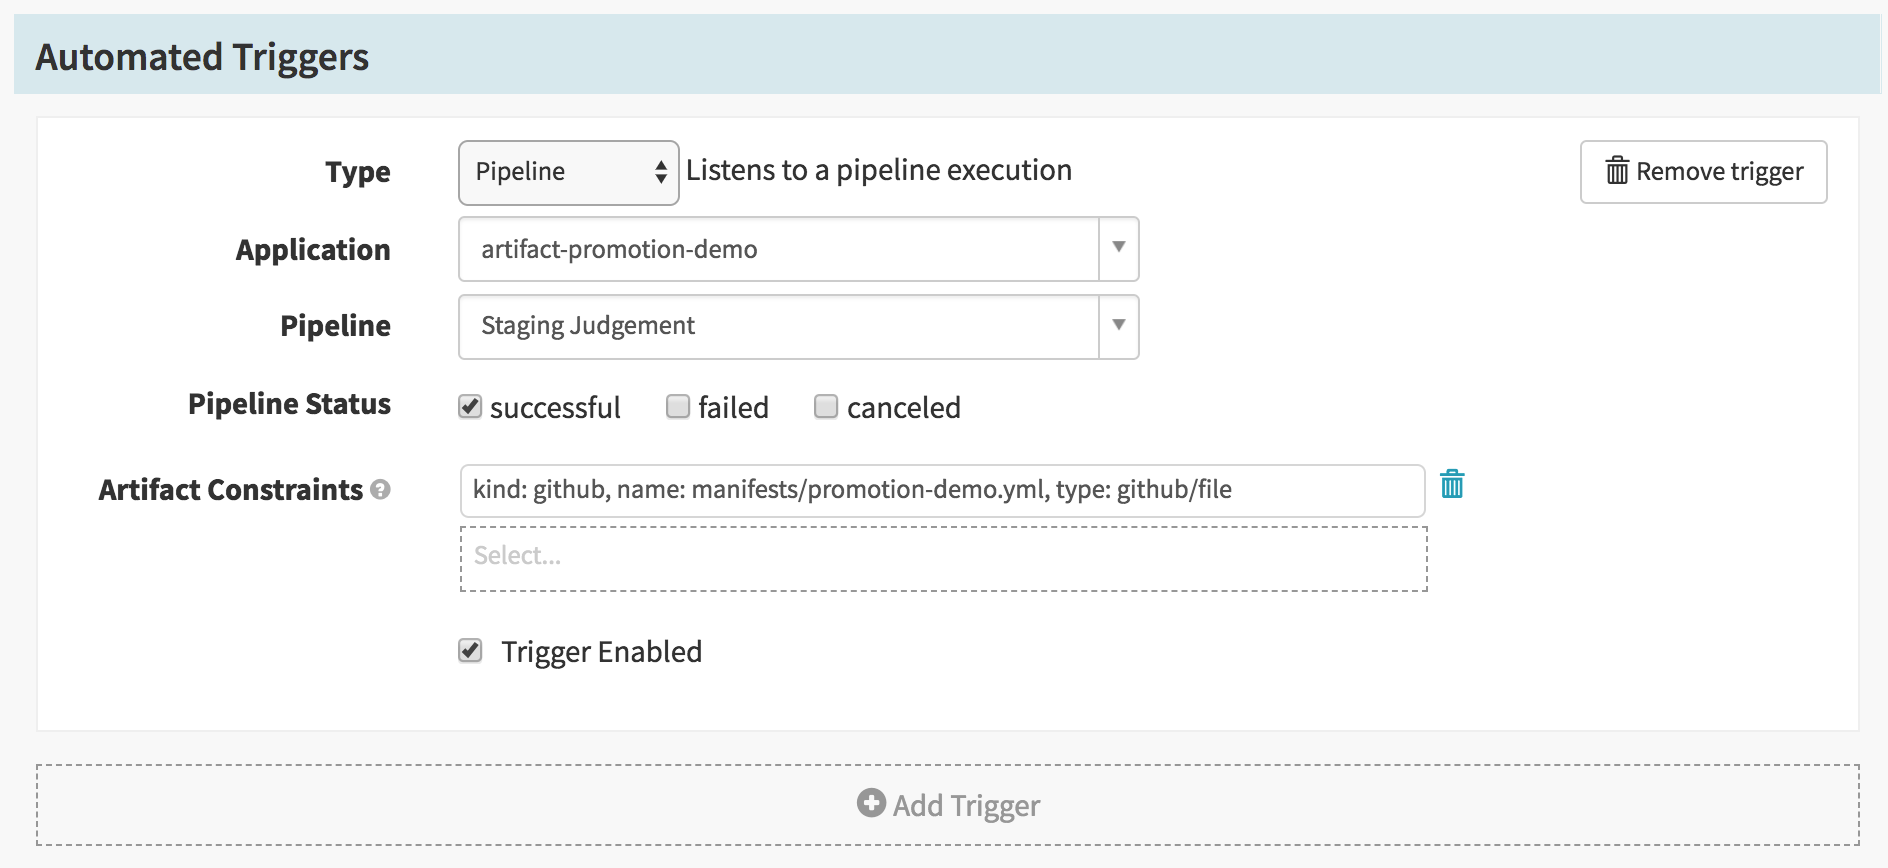
Add an automated trigger to the pipeline where the type is Pipeline. Select
the Deploy to Staging pipeline from the Pipeline dropdown. Check both
successful and Trigger Enabled from the remaining options.
Now click, Add stage and select Manual Judgement as the Stage Type. In
Execution Options select halt the entire pipeline for If stage fails.
Additionally, you can provide additional instructions in the Instructions
text-area.
Save your changes.
Deploy to Production
We are now ready to create the pipeline responsible for deploying our artifact to production.
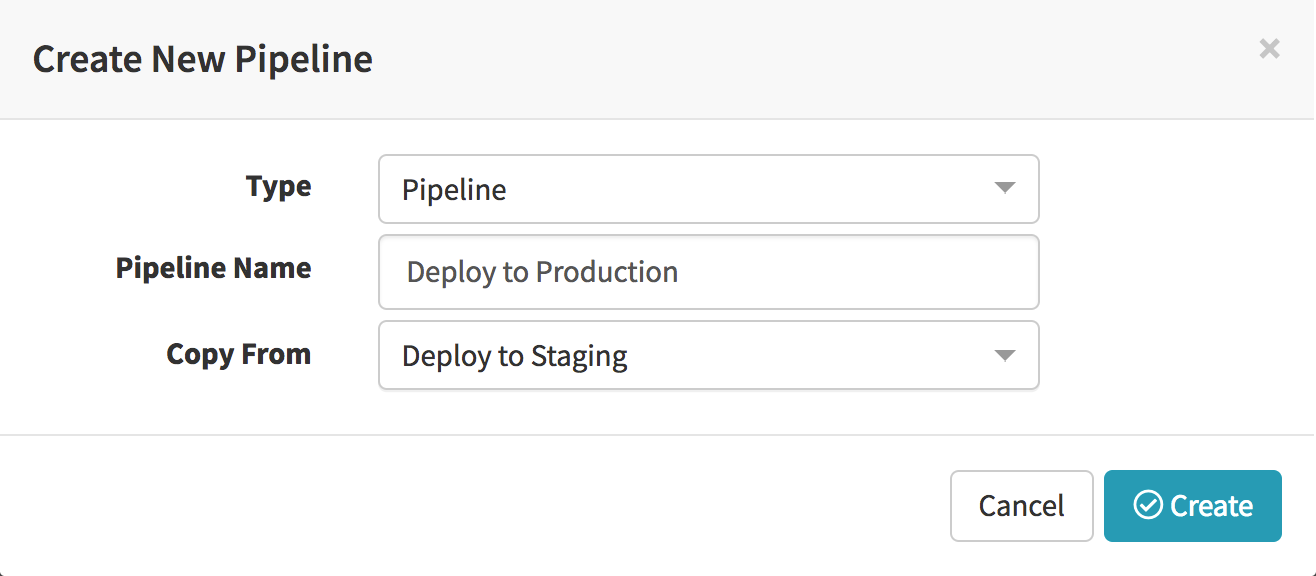
Click Pipelines and then click + Create to create a new pipeline. We have
named this one Deploy to Production and have made use of the Copy From
dropdown in order to copy our Deploy to Staging pipeline.
You will want to delete the Automated Trigger copied from our Deploy to Staging pipeline. In its place, create a new one of Type Pipeline. In
the Pipeline dropdown select Staging Judgement. Lastly, select
successful for Pipeline Status and select Trigger Enabled
Finally, add a new stage of type Deploy (Manifest). The configuration for this
stage should mirror the configuration of the Deploy (Manifest) stage of
the Deploy to Staging pipeline with the exception that specified account
should correspond to your production environment.
Summary
We have just shown an example of promoting a single artifact through a series of environments. While we relied on a Manual Judgement stage in order to validate the deployment of our artifact to staging before deploying it to production, we could also have used automated methods such as the successful completion of integration tests or through the use of canary analysis. Finally, although the example relied on only two distinct environments, adding additional environments is trivial.
See Also
Here are some other resources that may provide additional insight into the promotion of artifacts through a series of environments:
-
Spinnaker Codelab: Kubernetes Source To Prod (Manifest Based) – Steps 6 and 7 are of particular interest.
-
Watch this video about Deploying Helm Charts with Armory – Example of artifact promotion through environments managed by a single pipeline.
-
Github Repo example - https://github.com/armory/spin-helm-demo
Feedback
Was this page helpful?
Glad to hear it! Please tell us how we can improve.
Sorry to hear that. Please tell us how we can improve.